Kids Draw and Write Book: How to Use This Creative Tool Without the Common Setup Errors
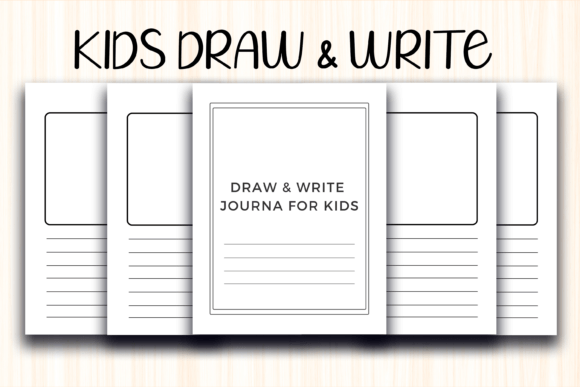
When you first come across the Kids Draw and Write Book as a ready-made KDP interior, it’s easy to focus on the promise of instant creativity. The idea is beautifully simple: a 100-page PDF with a clean 8.5 x 11-inch layout that invites children to sketch a picture and then write a few lines about it. Teachers, parents, and even small business owners building activity books for Amazon see the potential right away. But what many people overlook is that a small printing or formatting misstep can turn a crisp, enjoyable resource into a smudged, awkwardly trimmed stack of pages that frustrates rather than inspires. Let’s walk through the details that really count, so you can make every copy look exactly the way you imagined.
What’s Actually in That Instant Download
The download isn’t a physical book. It’s a high-resolution PDF file you can print at home, at a local shop, or upload directly to Kindle Direct Publishing. The interior provides 100 pages designed with a dedicated drawing area and lined writing space beneath it—no bleed, so nothing runs off the edge of the paper. The trim size of 8.5 x 11 inches matches standard US letter paper, which makes it incredibly convenient for home printing. Because it arrives as a digital file immediately after purchase, you can start a project the same day. However, assuming that all PDF interiors are created equal is where things often go wrong.
Not All Print-Ready Interiors Are Equal, Even If They Look Fine on Screen
One of the biggest misunderstandings is treating every KDP interior as plug-and-play. You might download the Kids Draw and Write Book, open it, and think, “Looks perfect.” On a laptop screen, the lines appear crisp, the margins seem generous. Then you send it to a home inkjet printer and notice the writeable area shrinks because your printer’s default settings add a small border. Or worse, you upload the exact same file to Amazon KDP without checking the trim requirements and later receive a proof where the content is shifted slightly off-center.
This happens because screens and printers interpret margins differently. The interior was built without bleed, which is a deliberate choice—it means you don’t have to worry about design elements extending beyond the cut line. That’s a design advantage for word-and-drawing layouts, but only if you use it correctly. If you’re printing at home, always select “Actual size” or “100%” in your PDF reader’s print dialog, not “Shrink to fit” or “Fit to page,” which distorts the margin proportions you paid for.
Why No Bleed Can Be Your Best Friend or a Hidden Trap
For a kids’ drawing and writing journal, no bleed makes complete sense. There’s no artwork bleeding off the page, so you don’t need extra trimming tolerance. That saves you from having to design a full-bleed background with safety margins. But here’s where it can backfire: if you later decide to add a colorful border or a decorative frame that touches the edge of the page, you’ll end up with unwanted white slivers after trimming. A common fix is to create a separate cover or page template with bleed for any edge-to-edge elements, leaving the interior pages intact. The best approach is to respect the interior’s original design intent—keep your decorative touches within the safe zone, which typically means staying at least 0.25 inches away from all edges.
Another overlooked detail: when using the file with a professional printing service, always check whether they require a bleed setting in their specifications. Many print-on-demand platforms will reject a file marked “no bleed” if your project’s cover or interior contains elements that should bleed. The Kids Draw and Write Book interior itself doesn’t need bleed, but your cover or any added pages might. Don’t mix the two without double-checking the final output settings.
Printing at Home vs. Sending to KDP: Two Different Worlds
Marketers and content creators who buy this interior to create a branded activity book for Amazon often underestimate the difference between a home printer and Amazon’s production chain. When you print a few copies in your office, you can tweak ink density and paper quality on the fly. But once the file goes to KDP, you lose that hands-on control. The paper stock (usually white 90 GSM) will affect how the drawing area feels under crayons or pencils. A high-quality PDF might look flawless on 24 lb bright white paper from your own printer, yet feel slightly different on Amazon’s standard paper. Before ordering a bulk shipment, always order a single author proof. Test it with actual kids—let them draw and write in it—and see if the experience meets your expectations. You might notice that the lines need to be darker for younger children or that the drawing box is slightly smaller than anticipated after trimming.
Another mistake is printing double-sided without adjusting for page creep. The interior is 100 pages, but if you print it front-and-back at home, the inner margins may feel pinched unless you use spiral or loose-leaf binding. For simple stapled booklets, the center pages shift outward. A quick test print of just four pages folded into a mini booklet can save you from ordering 500 copies that won’t lie flat for little hands.
Resolution Isn’t Just a Number on a Spec Sheet
“High PDF Print” quality often gets taken at face value. When the product description says the file is high resolution, it typically means 300 DPI or higher. That’s ideal for crisp text and smooth lines. But if you decide to scale the pages—for example, shrinking the 8.5 x 11-inch format to a 6 x 9-inch book—without properly converting in a professional program, you’ll lose that sharpness. Random resizing in a browser or word processor can turn clear handwriting guidelines into fuzzy ghosts. The same applies if you insert the pages into Canva or PowerPoint and stretch them to fit a different aspect ratio. Always maintain the original proportions or use a dedicated PDF tool to scale without degrading the vector elements. For the safest path, keep the interior at its intended 8.5 x 11 inches. The box and lines were designed with that canvas in mind, and any deviation alters the spatial balance a child will experience while drawing.
Making the Shared Drawing Space Work for Real Learning
Beyond the technical side, there’s a practical layer of how you introduce the pages to children or to buyers if you’re selling the finished book. A blank top section followed by ruled lines looks straightforward, but kids can freeze up if they feel pressured to produce a masterpiece. Instead of handing over the entire 100-page booklet at once, try pulling out a single page and modeling how to jot down a simple idea first, then sketch something that matches. When teachers and parents use the Kids Draw and Write Book this way, the writing becomes a natural extension of the visual story, rather than a chore. For your own Amazon product description, this is a selling point worth mentioning—the open-ended layout supports reluctant writers as well as confident little artists.
From a creator’s perspective, many shoppers will search for terms like “draw and write notebook for kindergarten” or “story paper journal.” Because this interior offers a balanced design without excessive decoration, it appeals to a wide age range. If you’re listing it on KDP, avoid the mistake of filling your description with only technical specs. Talk about the emotional benefit: the confidence boost a child gets when they see their own words next to their drawing, the joy of keeping a daily picture journal, or the way the format reduces writing anxiety by letting the picture lead.
What to Check Before Purchasing or Uploading the Interior
Before you click that download button or purchase a commercial license for the Kids Draw and Write Book, run through a short reality checklist. First, confirm whether the license terms allow you to sell printed copies on Amazon or other platforms. Many KDP interiors come with personal-use-only rights, and ignoring that can lead to copyright issues. Second, open the PDF on the device you’ll use for printing, not just on a phone or tablet, to see how your printer driver interprets the 8.5 x 11 size. Third, measure your printer’s actual printable area. Some home printers leave a non-removable bottom margin of 0.5 inches or more, which might slice into the writing lines. If that’s the case, you may need to print on a slightly larger paper and trim, or use a local print shop that can run borderless.
Fourth, think about binding. A 100-page stack is substantial. Saddle stitching won’t work for that page count. Coil binding, perfect binding, or simple loose-leaf storage are your main options. If you’re selling on KDP, Amazon will handle the perfect binding, but the spine width depends on paper weight and page count. Don’t design a cover with a fixed spine width until you know the exact interior specs. An 8.5 x 11 paperback of that thickness will have a noticeable spine, and your cover text might need repositioning once Amazon calculates the final dimensions.
Finally, test the drawing surface with the media children will actually use: crayons, colored pencils, markers. Some print papers absorb marker ink and bleed through to the other side, ruining the next day’s page. If you’re printing at home, a 24 lb or 28 lb bond paper usually holds up, but test one double-sided sheet first. If the interior will be printed on Amazon’s standard paper, know that it’s a bit thinner than typical sketch paper, so you might advise parents to slip a sheet of cardboard behind the page during use.
Small Adjustments That Yield Professional Results
The difference between a disappointing project and one that genuinely delights comes down to how you treat the download. When you treat the Kids Draw and Write Book as a flexible foundation rather than a finished product, you give yourself room to customize without breaking the underlying quality. You might add a personal nameplate on the first inside page, or if you’re building a branded series for your store, you could insert a simple “This Book Belongs To” page before the main content. Just remember to keep those additions within the no-bleed safe area and re-export as a high-quality PDF with fonts embedded.
For educators running a classroom project, printing the pages loose and letting children assemble their own booklet after a month of daily entries often works better than pre-binding 100 pages that may never be fully used. This approach also lets you select only the best pages for a final portfolio. It’s a small shift in thinking that turns a bulk interior into a flexible teaching tool.
The Kids Draw and Write Book interior offers a rare combination of simplicity and polish, but it won’t rescue a project that ignores the fundamentals of printing, trim, and child-friendly testing. When you take the time to match its specifications to your actual production environment—whether that’s a home office, a classroom, or an Amazon KDP dashboard—you end up with pages that invite children to draw and write without distraction. That’s the real payoff: a resource that feels personal, works reliably, and supports creativity exactly the way it was intended.